How to make Toy for Cat
Posted by brilokuloj on Feb 12, 2023
Or, how can we set and achieve realistic goals?
In 2011 I decided to get into sewing, with the express and singular goal of sewing my girlfriend a life-sized plushie of Slowpoke, her favorite Pokemon. Nothing gave me this idea except my weird, strange little brain, that when she said Slowpoke was her favorite Pokemon I thought “I’ll make you one!”
I started practicing sewing, literally just the basic stitches, on scraps of old underwear I wasn’t wearing anymore. Then I eventually got that pink and cream fleece, and I started teaching myself how to draft my own patterns, with the help of many many online tutorials by the likes of much more accomplished people (Abby Glassenberg, I owe you my life).
My girlfriend didn’t just put up with my piles of unfinished projects, she encouraged me through all of it. I knew she was ‘The One’ because she believed in me no matter how often my hobbies shifted. I felt supported. We moved in together. We got married. We adopted a cat.
And, as it turns out, sewing is just a great basic life skill for me. Even as I stopped making plushies as frequently (after finding out most people are not willing to pay for the amount of labor that goes into a project), I could mend my clothes in a snap so I wasted less money on new shirts, I was much more dexterous with my fingers, I built up better pain tolerance, and – most thrillingly – I discovered that 3D art is just… my favorite thing ever. As I got better at sewing, I got more into 3D modeling, because 3D models helped me visualize sewing patterns. All of my disconnected hobbies constructed me, a fully-realized person.
I did not ever make that Slowpoke. I still don’t know if I could; the ears were always the thing that stumped me the most. Now I don’t even know if I should; she is no longer into Pokemon.
But that Slowpoke taught me a lot. And, as sort of a sappy thanks to my wife and all of the people who supported me (even unknowingly, like Abby Glassenberg), I am going to walk you through the internal process of me designing my latest sewing project: a toy for my cat. It’s about as much of a tutorial as my disordered brain will let me make!
Goal
Start by setting a goal, no matter how broad.
I was going to take King St. Bee, our lovable character, and turn her into a kickable cat toy. (In my house we call ‘em ‘kickies’.)
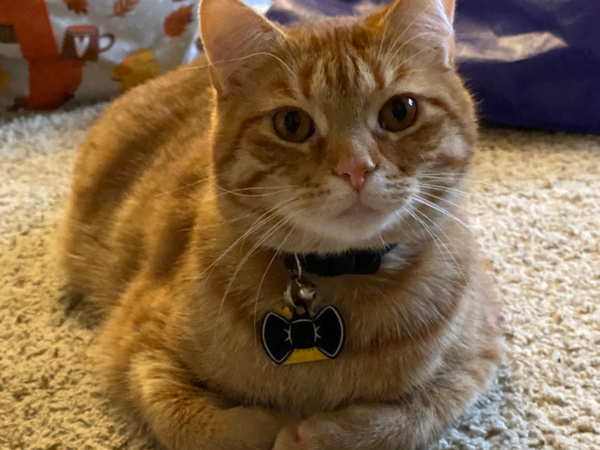
Here’s my cat, Dunkin Donuts Pumpkin Spice Signature Latte For A Limited Time Only:
And here’s King St. Bee:
One of the biggest things I see plushie makers struggle with is, in my opinion, over-designing everything. While also hardly thinking about design at all! You’re free to do whatever you want, and I’m not here to judge it as good or bad, but I have a feeling a lot of it comes down to “my favorite maker does it like this because her favorite maker does it like that.” And then just making life unnecessarily hard for yourself.
First, I had to ask myself, how could I make King St. Bee into a good cat toy? A thing about this is that cats actually seem to have very individual preferences, so I can’t give you a one-size-fits-all, you just have to know your cat. But my cat’s favorite toy is his jellyfish, a little awful thing we bought at a supermarket on a lark that he immediately destroyed. He likes it for having a hard body with ribbons attached; he’ll cling to the body and kick the ribbons.
So that means I could make some reductions to King St. Bee’s design, while still keeping her recognizable. That was fantastic news for me, as you might remember I had already made a King St. Bee plush in the past:
And her legs were unquestionably the worst part. I hate sewing little limbs. So why should I bother?
King St. Bee is blessed with a strong, distinct silhouette, so I figured I could get away with building her out of two pieces. I thought briefly about giving her ribbons in her ‘stinger’ area, but then the idea came to me to make her tongue the ribbons, and it blossomed into a full idea from there.
If you never really get your “a-ha” moment like that, don’t worry about it, dude. I didn’t always feel certain about anything I was doing, but eventually I started bullshitting it, and then I actually developed a sense for when I had a good idea. If something sounds just barely good enough, tell yourself “this is a great idea” and do it. The most important part of any project is keeping things moving, because the moment you slow down is when the brain fog gets in.
Then I had to get my supplies together. I had a sewing machine, thread, acrylic paint (I’ll explain that later), and I was actually lucky enough to already have a big scrap of red fabric that would make for good ribbons (I prefer to not have to slice off of my big rolls when I can help it). The two things I was missing was fabric medium and, most critically, yellow fabric. Somehow I had fleece in every color except for yellow. I did have yellow when I made the first Bee, but I tossed the entire yard while moving because it was some of the worst fabric I have ever used.
I don’t have any suggestions for kinds of fabric, you’re on your own with that one. Fleece is very cheap, I already have a ton of it, and I like the way it feels. Most people without my issues seem to prefer ‘minky’, which is this suuuper soft stuff you might associate with indie plushie makers… but I personally can’t stand it. I think it would be overkill for a pet toy, and also if a fabric has a fur-like texture my cat immediately tries to fuck it, so no thanks.
So I took a trip to the dreaded Joann (I miss Hancock so bad), got a bottle of fabric medium, and also got the perfect shade of yellow. Yes! I also bought enough that I can make a better full-size King St. Bee if I ever want to.
Patterning
I would recommend if you’re making a pattern, you should draft it with some throwaway fabric… but I’ve basically never bothered, since I have a good enough awareness of 3D space and don’t do particularly ambitious projects. This one is just two pieces and it’s a cat toy, so I already knew it would be a one-and-done for me.
This is a free pattern, if you’re willing to figure it out for yourself:
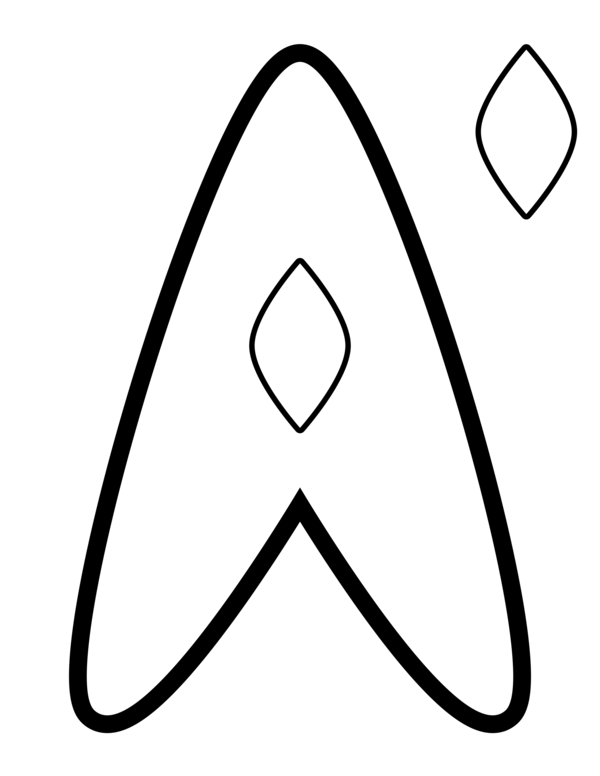
I designed this pattern in Inkscape. Inkscape is an extremely cool little program, if you have the patience for it. It’s good for making vector graphics, which are the best way to make anything that can be printable at different sizes without crispy pixel edges.
The white inside of the pattern is what it will ideally look like, and the black outline is the seam allowance (most professional sewing patterns make separate outlines for the seam allowance and the actual pattern, but I was making this for myself).
In order to make a correctly-sized seam allowance, I constructed the inside shape first. Then I put a 0.5in (half inch) ‘Stroke’ on the shape. I actually wanted a standard 0.25in (quarter inch) seam allowance, but strokes are drawn from the middle, not the edge. To counteract this, I set the ‘Fill’ to white, and in ‘Stroke style’, I made sure the fill is drawn in front of the stroke. Yay!
I then printed the pieces out with my glorious, beautiful Epson EcoTank ET-2850. I cut them out with scissors and put them on top of my fleece fabric. I traced them with a random dry erase marker, the only thing I had on hand that would mark on fleece.
This was around the point that I discovered the fleece I was using had a clear ‘wrong side’, i.e. a side that was worse to touch and look at. Sometimes it seems like fleece is double-sided, and then sometimes I buy some that has a nice fluffy edge and a gross starchy edge. I was very lucky that I had already picked the wrong side to draw onto. Keep it in mind.
Sewing

Here she is all laid out. But I didn’t get any more pictures of this step because I didn’t know I was going to write such a long-ass article about this. My bad!
I honestly didn’t know how I wanted to attach the ribbons, so I just kind of aligned them against the mouth of one of the body pieces (facing inward, because we’re turning it inside-out later), did a basting stitch (ran it through the sewing machine without doing a backstitch to tie it down), and then threw the other body piece on top to make a sandwich.
Then I pinned those together.
I hate pinning.
You always want to use more pins than you think you need. Sometimes I like it. Sometimes, just sometimes, I’m in a good mood, and I find it fun. This was not one of those times. I didn’t use enough pins and I paid the price.
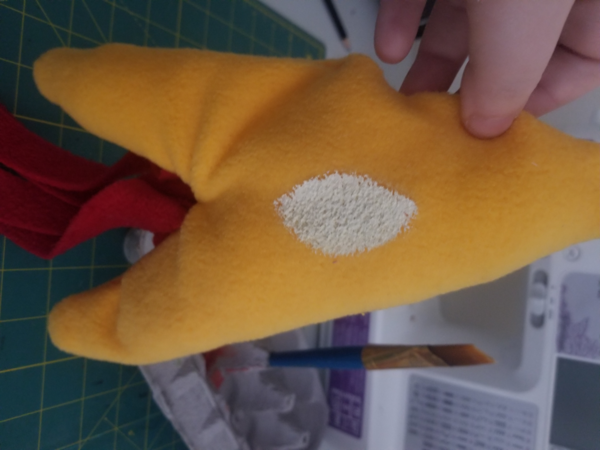
You wanna leave a big hole (always bigger than you think you need) in an ideally inconspicuous location, so that you have room to flip it inside-out and stuff it. The bigness of the hole is crucial so you don’t pop any stitches when you’re reversing it. There’s no easy space to hide it here, so I just picked the top of her head. I used Poly-fil in loose handfuls, and closed the hole with a ladder stitch.
Details
I painted her eyes directly on with acrylic paint (non-toxic) and fabric medium (non-toxic). Fabric medium, also known as textile medium, is a magical substance that converts acrylic paint into fabric paint by making it more supple and capable of clinging to the fabric without cracking.
I did make the crucial mistake of using way too much paint in the first place instead of just waiting for individual layers to dry, so she took a whole 24 hours to dry. Or maybe I used too much fabric medium? I spent the day walking back and forth between the living room and my work room, loudly announcing “Is she dry yet? She’s still wet!” Learn from my mistakes.
Also, this was actually the hardest part of the design for me, for safety reasons. You might have noticed in the pattern that I had also included an eye you could cut out, if you wanted to. Well, I had initially considered cutting her eye out of fabric and sewing it on, either by hand or by machine. That’s certainly what would be safer… for babies. The problem is, there’s no magical stitch I could do that would keep my cat from tearing her eye off of her little head with his back claws. And then what?
Babies explore their world with their mouths more than my cat does, and they aren’t armed with razor blades. If her eye did come off, it would leave strings that could get stuck on his claws – or in his mouth (way more likely to happen if it gets on the floor). All of that is a much more immediate danger than him putting plastic in his mouth, which, the fleece is also made out of plastic and so are all of his toys.
Fuck, man.
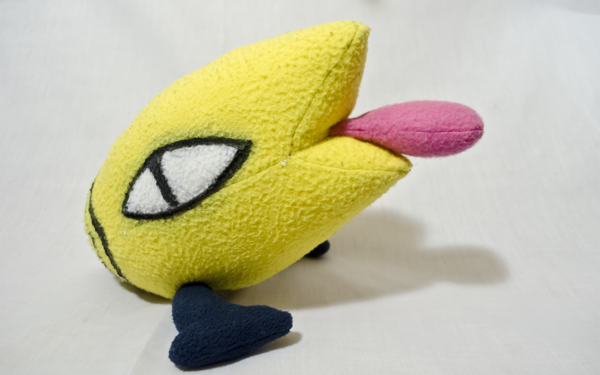
All done
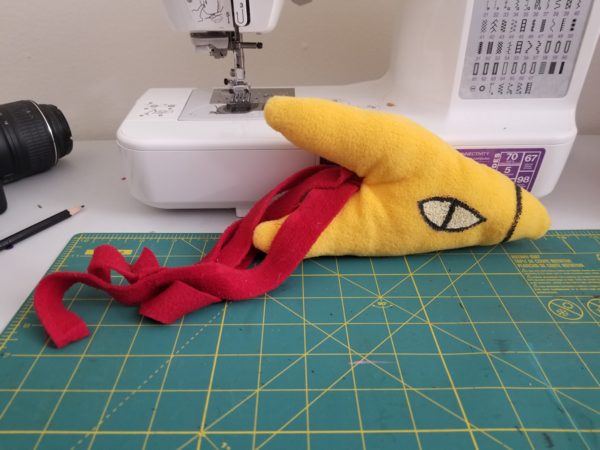
That’s enough ecological crisis for me today. Here she is, all done! Sorry my cutting board is a mess, I know I need to clean up my workplace, blah blah blah this isn’t Instagram.
Her mouth is crazy puckered, probably because of me half-assing sewing the ribbons in place. You know what I bet would have fixed her? More pins. Oh well. I think she looks just charming.
Now it’s time to expose her to my cat!
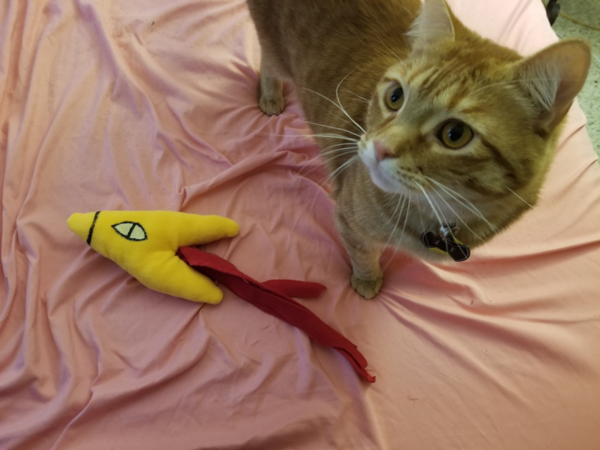
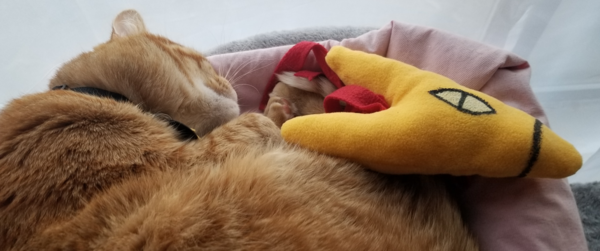
Investigating her…
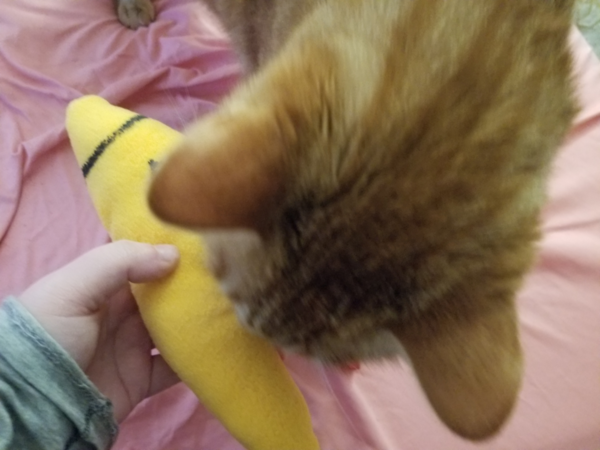
What does he think?
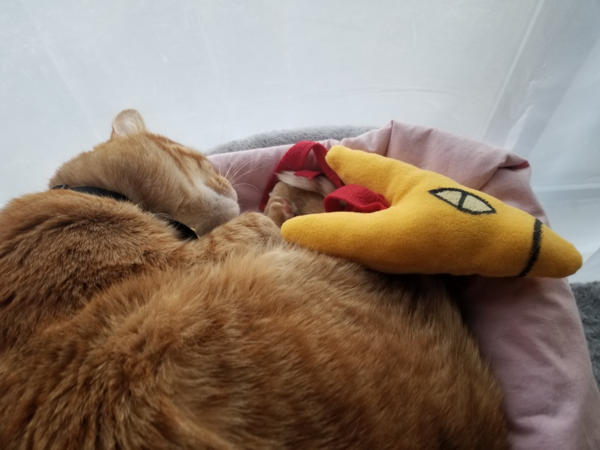
Okay, well, here’s the weird part: as of me writing this paragraph, Dunkin has had her for about 3 hours, and he has spent the entire time cuddling her. I tried a couple times to engage his murder mode, but he just loves her. The weirdest thing is that he has never expressed any interest before in snuggling any of his toys. I had initially set out confident that I was making the toy optimized to make him want to kill, but I’ve unlocked some sort of new emotion in him.
I’m completely stumped.
But, I mean, that’s the cool thing about art. Missing a goal is not a failure. The outcome you were going for isn’t always the goal you started with, but sometimes it can be something even better. Or maybe he’ll come around to wanting to kill her, but it still makes him happy either way, and that’s a better summary of what I wanted anyway – just something silly to make my cat happy.
And now, if I want to try making something for him again, I’ve learned a lot. I might make something with a body that’s less snuggly. Or maybe I can make him a little King St. Bee warming pillow.
That’s why it’s always important to just… keep things moving.
Tagged: adulting cats crafts dunkin donuts pumpkin spice signature latte for a limited time only king st. bee sewing sewing pattern tutorial