How to make a shadeless material in Blender
Posted by brilokuloj on Mar 13, 2020
 brilokuloj: Hi, it’s me from the future! This tutorial is unnecessarily complicated because I hadn’t figured out the new UI at all yet, but I don’t see myself rewriting this any time soon, so I’m leaving it up as a look into the past.
It would be a shorter list to say the things that Blender 2.8 didn’t change. All of these changes have been great for professional users, but they’ve certainly alienated Blender’s long-term hobbyist userbase. As an amateur professional, I’m hoping to help bridge that gap.
It’s a surprisingly popular question with a surprisingly complicated answer: how do you get a Shadeless material in Blender 2.8?
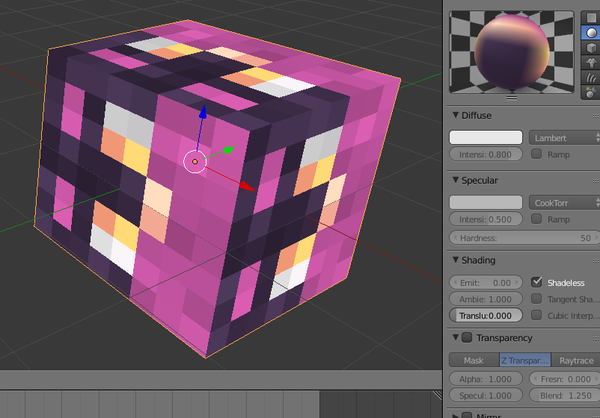
Shadeless materials accept no lighting information, meaning they will always be the same color in any lighting environment. They have tons of uses, especially for low-poly art and toon shaders. And they used to be so, so easy: as recently as Blender 2.79, you could achieve it with a single button press.
Obviously this wouldn’t even be an article if that button was still around. So how do you do it now?

If you have a textureless object in a very simple scene and you want your instant gratification back, go to the Material Properties tab and change Surface to Emission. Yay, you’re done!
No, seriously, you’re done. But, if you’re planning on using textures or indirect lighting, or you’d just like to learn, then keep reading.
First off, click on the object you’re editing if you haven’t already, and go to the Shader tab. The workspace tabs are up at the very top of the program. Now you’re in the Shader Editor! It’s a bit intimidating in here, but I promise it’s not as scary as it looks. The node interface is very interactive, and your work gets updated in real-time, so you won’t have to re-render every time to see if you messed up!
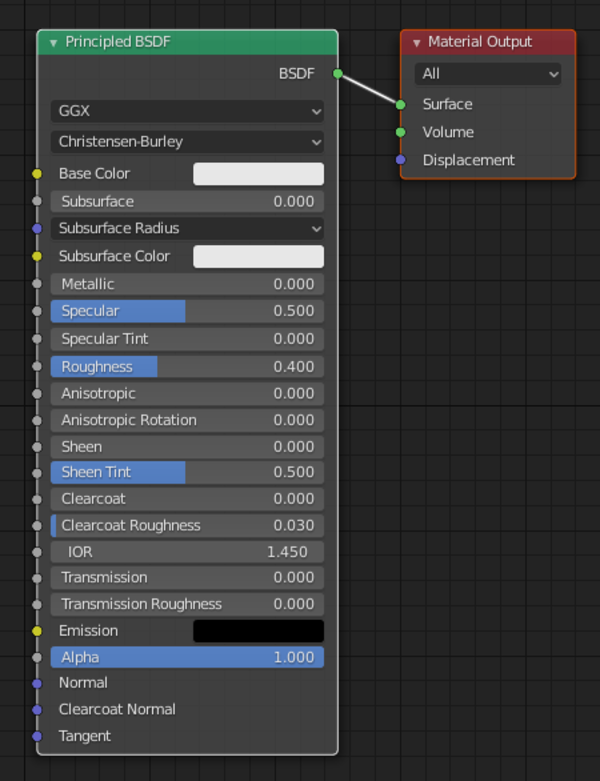
The default cube starts with a Principled BSDF. What on earth is a BSDF, by the way? Go ahead and Google that one… good luck, cos I can’t explain it. There’s a CG Cookie video about it, maybe that will help? I just call it a fancy shader.
The shader handles all the color and lighting information, and then sends it to the ‘Surface’ input in Material Output. The Material Output is the endpoint because it’s the part that actually puts the colors on your screen.
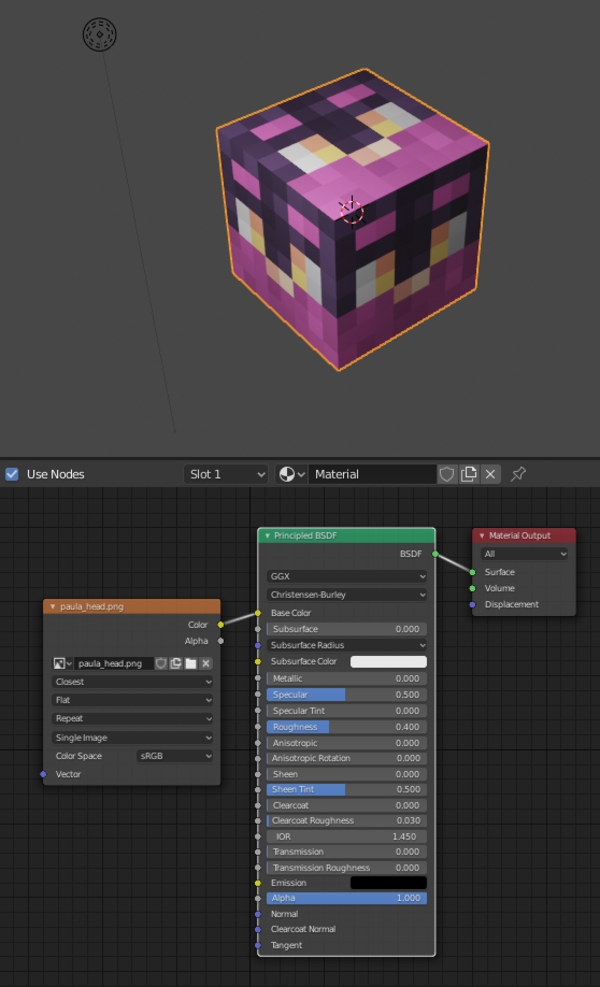
I’ve put a texture on our cube so that we can see what we’re looking with. Adding a texture is simple enough: click Add on the top of the Shader Editor, and type ‘Image Texture’ into the search function. Put your image file into Image Texture, then connect the Color output to the Color input of your shader. In short: click and drag the yellow circle to the other yellow circle. There you go!
I’m still using Principled, though. How can we get rid of that lighting?
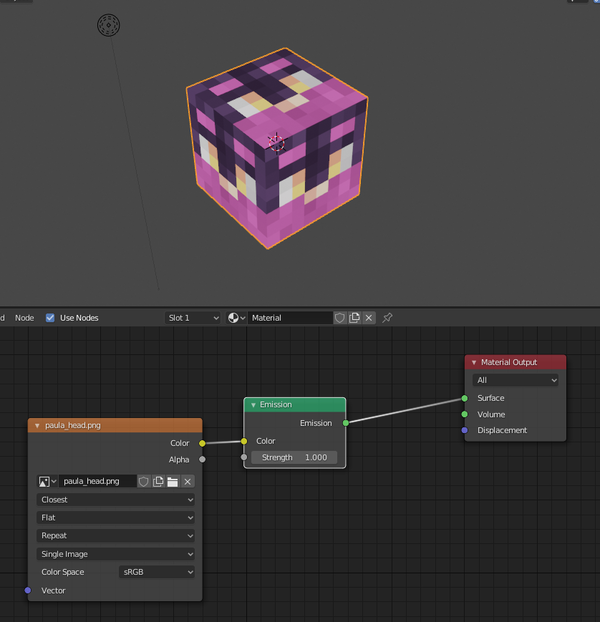
To make your material ‘shadeless’, remove Principled, and replace it with an Emission shader. Connect your texture to it in the same way. Then you connect Emission’s output to the Surface input of Material Output. And there you go, no more shading!
But … what if you’re planning on having indirect lighting in your scene? That could be a problem.
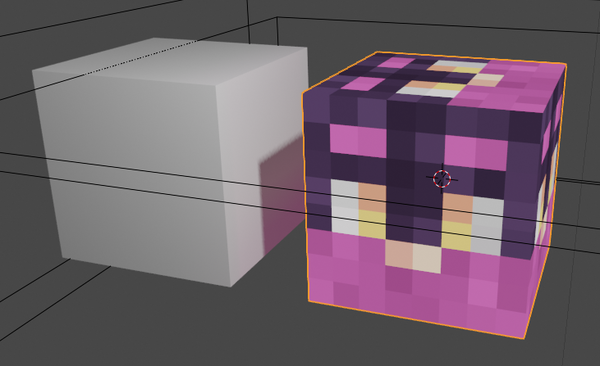
As you can see, Emission is not just shadeless, it is actively glowing. It counts towards indirect lighting – meaning your object will be casting its light onto the environment. This is kinda cool, but there are certainly cases where this isn’t be ideal. Thankfully, it’s a relatively simple fix.
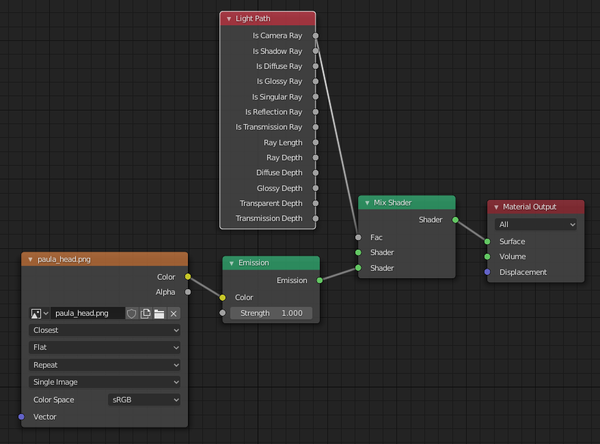
Here’s the final setup for indirect lighting. Connecting ‘Is Camera Ray’ to the ‘Fac’ (Factor) input of a Mix Shader, with your Emission connected to the second Shader input of the Mix Shader, makes sure that only the camera can see the lighting. Bake Indirect Lighting will basically be seeing a totally black object, meaning it doesn’t glow anymore. Hooray!
Categories: ways